Have fun making this cute woven Easter basket craft with the kids in your life. This craft encourages the use of lots of skills and involves different art materials.
Cute woven Easter basket craft
My kids always like to make crafts around the holidays. This is a cute woven Easter basket craft that we came up with. The craft has lots of different textures, with woven paper, clipped paper grass, and yarn for the basket handle. There are lots of skills that kids can practice while working on this art project, including cutting, gluing, weaving and braiding. For younger kids, you will probably need to help them with the cutting and weaving. I created a free download template that you can use, and you’ll find all the steps explained below.

Step one: Printing and Cutting
Start by printing out the free download with templates to make this cute woven Easter basket craft. The woven effect is more prominent if you use different colored card stock paper to print out the Easter basket and the weaving strips. However, if you have only white printer paper, that works too. It means you can add more color to your craft with markers or paint. I included a picture of a white basket below.
Cutting the slits and strips
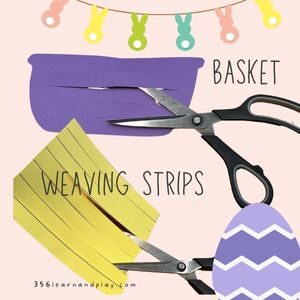
Next you’ll cut horizontal strips in the Easter basket. If you gently fold over the paper, you can snip the lines to start. Having the snipped holes makes it easier guide in your scissors and cut nice straight lines. Then, you’ll cut the weaving strips along the dotted lines.
Step two: Weaving and gluing
To weave your cute Easter basket, you start with one strip and weave the paper in an over-under method. It will start to look like a checkerboard pattern when you use alternating over-under weaving. I waited until I got all the strips woven before gluing them down. In case you make a mistake you might need to go back and fix your weaving.

Tip: put the printed template pieces facing backwards so that you won’t see the dotted lines where you did your cutting.
When you’re finished weaving, you’re ready to glue down the top and bottom strips of paper to the Easter basket. A glue stick or white glue will work well. Next, you can trim the excess strips from the basket. Finally, you’re ready to glue the cute woven Easter basket to a piece of background paper.
You can use construction paper or card stock for the background. If you don’t have colored paper, you can glue the basket on white paper and decorate your own background. I added some finely cut green grass for the basket to sit in. It adds a nice texture to the project.


Step three: Adding the handle and the eggs
To make a handle, I used yarn and braided three pieces together. If you don’t have yarn, you could use string, ribbon, or even pipe cleaners. You could also paint or draw on a handle if you don’t have these supplies handy.
To glue on the yarn handle, I used white glue, as it’s stronger and more likely to stay in place. I also added a colored pasta bow that I had from a sensory bin that I’d made. Other ways to make bows are to use ribbon, paper, pipe cleaners, or draw or paint a bow on your project.
Adding the eggs
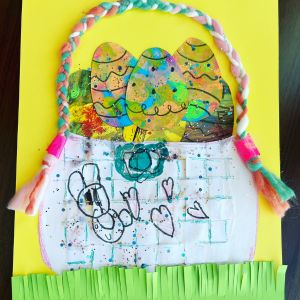
I included eggs in the printable template that you can paint or color. You could also make your own colored Easter eggs. Here’s a picture of another woven basket that we made reusing painted paper from another art project.
Once you add in your eggs, add whatever else you’d like in your project. One of the great things about kids art, is that no two pieces are alike. Kids enjoy having freedom to explore with different art mediums. It’s nice for them to know that they can personalize their own work. I really love the cute bunny that my daughter added to her basket.
If you’re looking for another textured Easter basket craft, here’s an idea that uses a paper plate and yarn.
Happy Easter!


